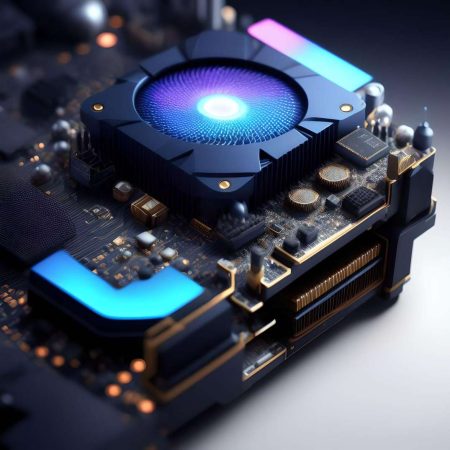
Intensive users should take a minute or two to check the CPU temperature to avoid any chaos before it happens. You never know when it will catch up with the heat and damage the motherboard. It’s a myth that when the CPU picks up the heat, it starts to perform better. In reality, it’s quite the opposite. When the CPU gets overheated, something is not going well in the circuit city.

In the previous versions of Windows, no one had the luxury to check the CPU temperature of your own. You had to take it to the technical person who fits the condition of the CPU. In Windows 11 or earlier versions, you can quickly check the CPU temperature by using third-party applications or even in the BIOS/UEFI.
In this learning guide, we’ll show you a step-by-step method on how to check CPU temperature on Windows 10 and 11. Stay with us. Every day is a learning day!
Table of Contents
Why is it Important to Check the CPU Temperature?
First of all, it’s normal for the CPU to pick up the heat, especially when you put your PC on an intensive workload. You shouldn’t have to worry about the processor’s heat if it’s around up to 80° C (176° F). The ideal temperature for most processors is between 40-70°C (104° – 158 °F) for an average workload. At intensive workload, it can go beyond 85° C (185° F), which can damage your PC in the long run.
In reality, it doesn’t show any behavioural changes to the PC’s performance, but it does reduce the lifespan of your PC’s CPU. That’s the first thing to avoid if you work in an intensive environment, like playing heavy games, video editing & 3D simulation, etc.
If your CPU overclocks the heat barrier at regular intervals without any rest, you might have to face a series of underlying problems, from sudden crashes, lagged performance, freezing screens, or even damage to the heatsink and other hardware components on the motherboard.
It’s important to take preventive measures and not let your CPU overclock the heating barrier before it gets too late. Taking preventative measures is better than spending $1000s on new components.
How to Check Your CPU Temperature in Windows 10 & 11
Two ways to check the CPU temperature in Windows 10 and 11: using the system’s built-in BIOS/UEFI settings or downloading a third-party application. Windows has no default application to monitor the CPU temperature on the run; you’d have to check the processor temperature in the BIOS/UEFI.
The third-party application provides more value as you don’t have to restart your PC to check the CPU temperature constantly. The following third-party applications let you monitor the CPU temperature regularly, even while playing the games:
- HWinfo
- Open Hardware Monitor
- SpeedFan
- AMD System Monitoring
- Core Temp
- NZXT’s Cam
How to Check CPU Temperature Using BIOS/UEFI
If you don’t want to use a third-party application to check the CPU temperature in Windows 10 and 11, checking the temperature using BIOS/UEFI will give you an idea of whether your CPU is heating or not.
To check the temperature, restart your system and press F2 or Delete (mainly used keys) during the boot to enter the UEFI settings.
Once you are in the UEFI mode, anything that looks familiar to monitoring or sensors. In monitoring and sensor mode, you should be able to follow the real-time sensor readings, including the processor temperature.
Once you have checked and made sure that the CPU temperature is in the normal range as it is supposed to, press F10 to exit the UEFI/BIOS interface and initialize the booting process.
The downside of checking the CPU temperature in BIOS/UEFI is that you will not be aware of the processor temperature while computing. Whenever you feel the CPU heating, you would have to restart the PC to determine the temperature.
How to Check CPU Temperature without UEFI/BIOS
BIOS/UEFI can’t tell you the status of CPU temperature while using your PC; probably not the best way to identify the temperature. The fact is even if you use BIOS to check the CPU temperature, your machine would be in a resting state; therefore, you cannot judge the exact CPU temperature.
The best and easiest way to check the temperature is to download the CPU temperature monitor on your Windows 10 and 11. Before downloading any of the third-party applications, you need to check the background credibility and history of the application. If it’s popular and malware-free, you should go with it. Otherwise, don’t even try to risk it.
Here’s how to check CPU temperature in Windows 10 without BIOS/UEFI:
- Login to your PC, download the CORE Temp application, and install it on your device.
- As soon as you launch the application, you’ll see its main interface.
- Under “Processor #0: Temperature Readings,” you can check the CPU temperature for each core. Below is an example of a CPU temperature averaging 50° C (122° F) of an Intel Core i7 2600K (Sandy Bridge) system.

- The “Max” column suggests the highest CPU temperature ever read by Core Temp, and the “Load” column reads the current status of each CPU core.
Well, that’s how you can check the CPU temperature in Windows 10 & 11. Plenty more applications available in the market can provide the same results. We already mentioned a few of them in the previous section, while the best and easiest way to check the average CPU temperature is to do with Core Temp.
What Should be the Optimal Temperature for your PC’s Processor?
The optimal temperature for your PC’s processor depends upon the variety of CPUs you use. Sometimes, at intensive workloads, your CPU temperature overclocks more than the average temperature, which is an acceptable temperature according to the situation. However, anything beyond 80°C would be catastrophic for the CPU lifespan.
The average temperature of the CPU lies between 40-70°C (104° – 158 °F), which is considered as suitable for a minimal workload. It can rise up to 70-80°C (154° – 185 °F) while playing heavy games or intensive workloads like video editing, 3D simulation, etc.
The general rule of thumb says that you should let the CPU go beyond 80°C (185 °F) if you want to use your PC for a longer run. If you keep the temperature at 80°C while playing games and other stuff without cooling the CPU, you will have to face the consequences of exceeding the limits.
The heating problems mainly occur in compact devices like laptops, so most gamers don’t use laptops for intensive gaming. Desktop PCs are best if your intention is just to play games and other hefty stuff. The reason is that there is always plenty of space around your whole PC case. You can add extra expensive CPU coolers that let your CPU overclock, maintaining the temperature simultaneously.

How to Cool Down the CPU Temperatures
If you are facing a heating problem constantly and want to bring down the CPU temperature, you have to follow the below fixes;
1. Clean your PC
First and foremost, you need to open the PC case and start vacuuming your PC. Remove any dust you see sticking to the CPU fan’s surface. Place your finger on the propeller and blow the dust with compressed air dusters. This will help you unclog the inside of the CPU fan.
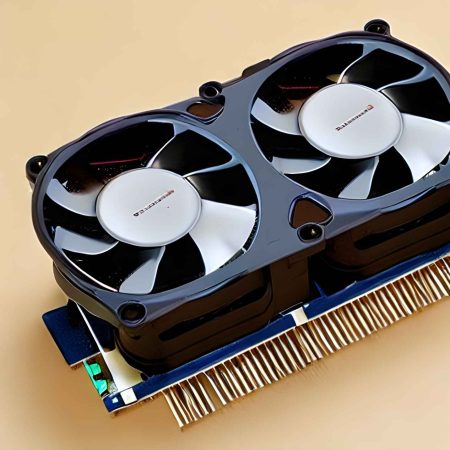
2. Change your cooling fan
Sometimes, cooling fans can be the reason for overheating processors. Suddenly, they stop spinning without any warning and get back on. It’s a regular thing for some PCs, but if you haven’t put the workload and the fan starts to do the same, it’s malfunctioning. You need to the CPU fan ASAP!
3. Keep the surroundings clean
How many times do we have to mention the dusty environment? Dust can be the main culprit here for slowing down the PC. It not only brings heat to the CPU but also makes it rusty to other components as well.
4. Disable the background applications
CPU never sleeps, even if your system is idle. It keeps the calculations going in the background. You need to keep those background applications at full stop to boost the CPU performance and prevent it from overheating.
5. Apply thermal paste
Sometimes, removing the old cooling paste (thermal paste) can solve the problem of CPU heating problem. Thermal paste is the first layer that keeps the CPU temperature in check. Don’t try to apply it by yourself unless you are an expert in it.
Conclusion
CPU temperature plays an important role in providing a smoother experience. It can be frustrating for the end user if it gets too hot. If you ever get stuck in a similar situation, like lagging and freezing/not responding screens, this article will help you check the CPU temperature in Windows 10 and 11.